Chrome might be your favorite browser, but its appetite for memory is a serious concern. Thankfully, a hidden setting keeps it from devouring all your RAM while you browse.
I Love Chrome, But It’s a Memory Hog
I have always loved Chrome. It’s fast, easy to use, syncs perfectly across all my devices, and feels like home whenever I open it. But there’s one issue I’ve always hated about it—its appetite for memory.
No matter what laptop I used, Chrome was always hogging RAM, as if it couldn’t get enough. Tabs froze whenever I switched between them, and the laptop fan sounded like an aircraft engine if I opened more than a handful of tabs. Sometimes, the lag was so bad that even typing felt sluggish.
I tried everything people recommend. I cleared the cache regularly, disabled extensions I barely use, and closed background tabs. Sure, these tricks helped a little, but the relief was always temporary. Before long, Chrome was back to consuming excessive RAM, and my laptop felt sluggish all over again.
I didn’t want to switch browsers. All my passwords, bookmarks, extensions, and little workflows were set up exactly how I liked them. But I knew something had to change. I needed a solution that would let me keep using Chrome without sacrificing my tabs, and that’s when I found a hidden toggle that finally solved the problem.
The Hidden Toggle That Finally Fixed Chrome’s Memory Problems
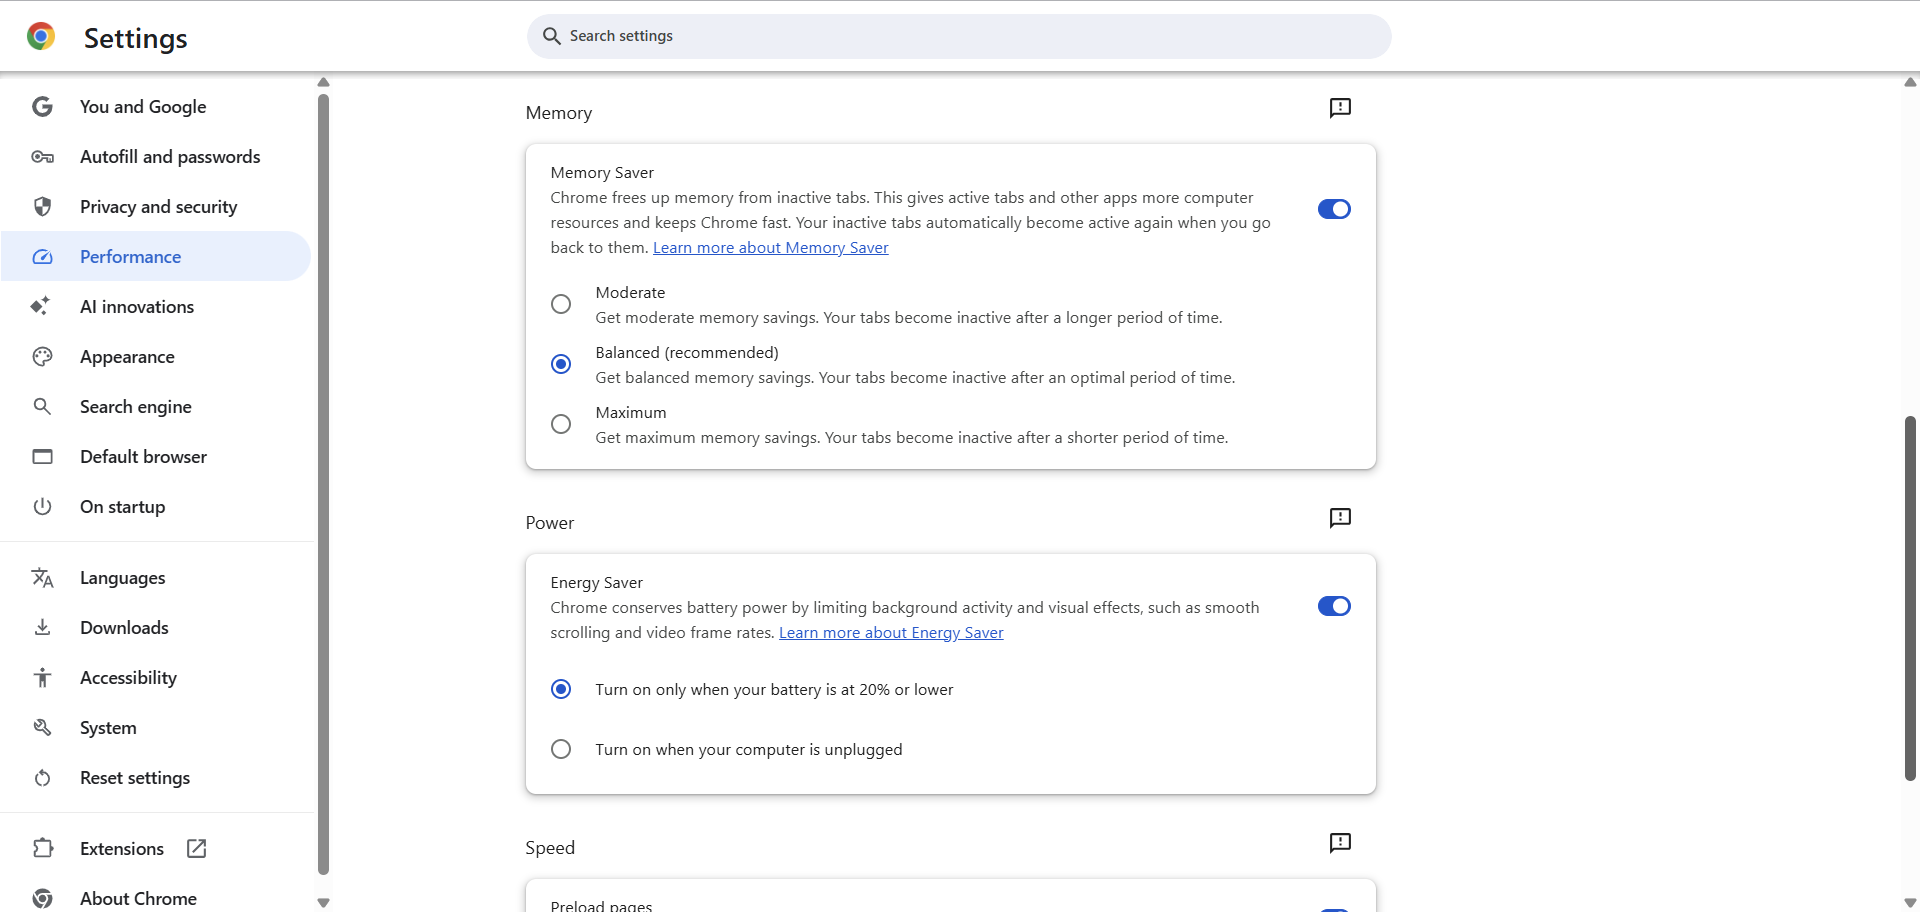
One morning, after my laptop almost melted from Chrome’s endless hunger, I decided to dig into its settings just to see if there was anything I’d missed. Deep down, I didn’t expect to find anything new. But then, under the Performance section, I spotted Memory Saver.
At first, I thought it was just another setting that probably wouldn’t do much. Still, out of frustration, I turned it on anyway.
Nothing changed right away for me. But after browsing for a while, I could tell that something was different. Chrome felt smooth, tabs switched without lag, and changing this one setting kept my laptop cool. It felt like Chrome had finally figured out how to handle memory better.
If you’re sick of Chrome hogging your RAM too, here’s how to turn Memory Saver on:
- Open Chrome and click the three dots in the top right corner.
- Head to Settings, then click Performance in the side menu.
- Under the Memory section, toggle on Memory Saver.
That’s all it takes. A quick switch, tucked away in a menu most people never check, can make Chrome run smoother without forcing you to close tabs or ditch your favorite extensions.
What Does Chrome Memory Saver Do, Anyway?
Memory Saver is exactly what it sounds like. It automatically suspends tabs you haven’t used for a while, freeing up your computer’s RAM by offloading data from those tabs. This gives you more memory for the stuff you’re currently using. Think of it as pausing background apps on your phone to keep everything running smoothly for what you’re focused on right now.
When you enable it, Chrome automatically snoozes tabs you’re not actively using. These tabs appear slightly faded, and their icons may look dimmed, with a subtle circle around them to indicate they’re inactive. When you click back on one, it reloads so you can continue where you left off.
Initially, I didn’t realize what was happening. I had a bunch of tabs open while researching something for work, and my laptop wasn’t struggling as usual. Then I saw that little icon. Chrome was putting tabs to sleep quietly in the background, protecting my system from usual slowdowns.
Most of the time, it’s seamless. I could have 30 tabs open and still switch between the ones I’m actually using without any delay. The only minor interruption is when you return to a sleeping tab, and it reloads, which usually takes a second or two.
Memory Saver felt like a lifesaver for a feature I didn’t even know existed. But, as I soon found out, it’s not without its flaws.
When Memory Saver Wasn’t on My Side
While Memory Saver keeps Chrome running smoothly, it may not always be in my favor. Sometimes, I leave a tab open with unsaved work, like notes in an online writing app, and step away for a few minutes. When I return, the tab refreshes, and everything I wrote disappears.
Other times, I pause a YouTube video, hoping to finish it later, but it reloads, and I lose the place I was in. These moments are frustrating because Memory Saver puts inactive tabs to sleep to free up memory. It may disrupt your workflow when you’re working on something critical or want to resume exactly where you left off.
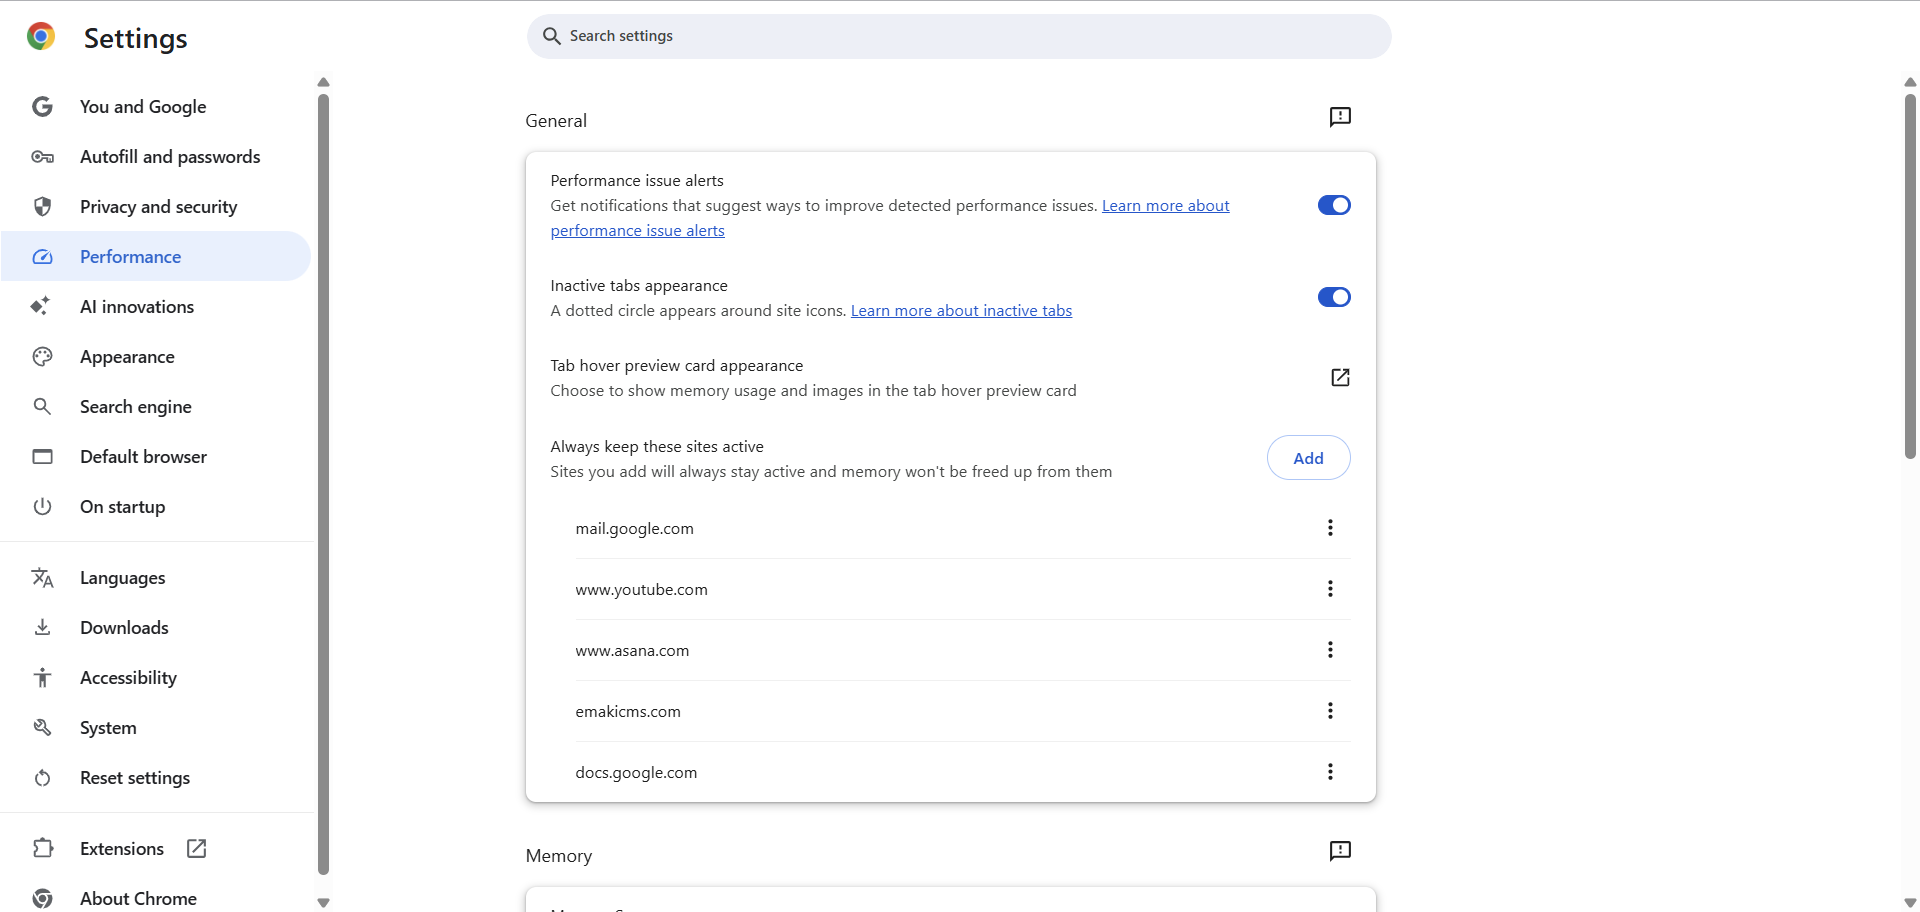
Thankfully, there is a way to manage this. Under General in the Performance settings, there’s an option called Always keep these sites active. I added sites like Google Docs, Gmail, and YouTube to this list, so Chrome never suspends them. This way, Memory Saver optimizes RAM without interrupting tabs, so I can stay active throughout the day.
Even though it has its downsides, I still use Memory Saver every day. It keeps Chrome light and responsive without forcing me to close my tabs. Just remember to protect the tabs you can’t afford to lose. It’s a small tweak that can make a huge difference in how Chrome runs while letting you browse the way you always have.


Leave a Comment
Your email address will not be published. Required fields are marked *